


How to Make an Origami Shirt: Easy Step-by-Step Guide
Difficulty:
★★★★★
⏱5-10 mins
📄Specialized Origami Craft Paper

🎬Video Tutorial
📐Step-by-Step Diagram
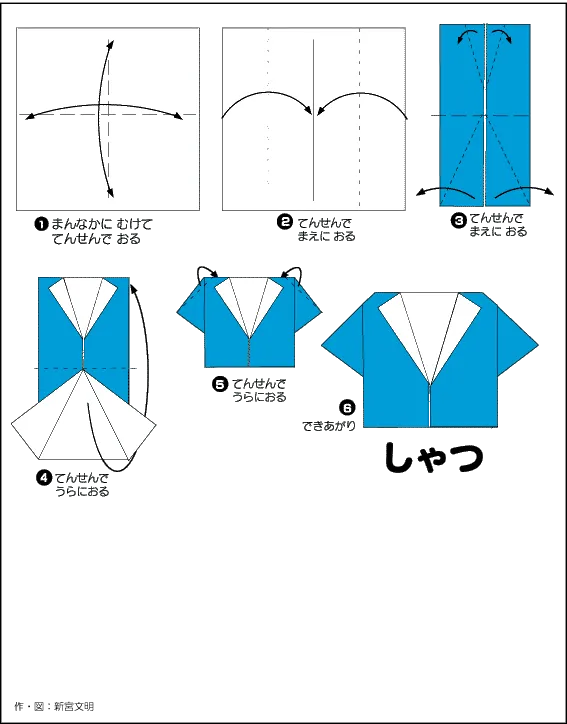
📝 Folding Steps
- Step 1: Fold the paper in half along both diagonals, then unfold to create preparatory creases.
- Step 2: Fold both side edges towards the center, aligning with the central crease.
- Step 3: Fold the two top corners downwards diagonally to form the collar. Simultaneously, fold the two bottom corners upwards diagonally to shape the shirt flaps.
- Step 4: Fold the entire bottom flap upwards, covering a portion of the shirt body.
- Step 5: Pull and fold the side edges outwards to form the two sleeves.
- Step 6: Your Origami shirt is complete!


