


How to Make an Origami Jacket: Easy Step-by-Step Guide
Difficulty:
★★★★★
⏱5-10 mins
📄Specialized Origami Craft Paper

🎬Video Tutorial
📐Step-by-Step Diagram
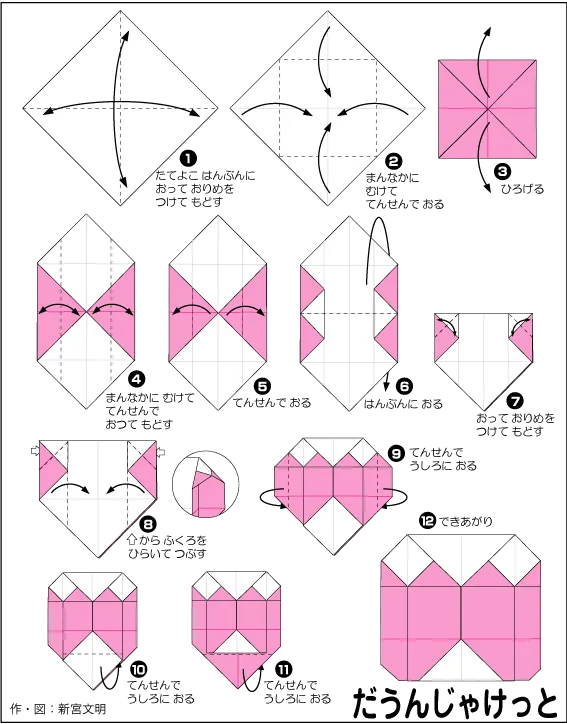
📝 Folding Steps
- Step 1: Start with a square sheet of paper. Fold the paper in half vertically and horizontally, then unfold to create cross creases.
- Step 2: Fold all four corners of the paper to the center.
- Step 3: Flip the paper over.
- Step 4: Fold the top and bottom edges to the center crease.
- Step 5: Open and flatten the layers on both sides to form triangles (as shown in the illustration).
- Step 6: Fold the two side edges to the center crease.
- Step 7: Fold the two small top corners outwards.
- Step 8: Fold the two upper corner sections downwards to create the curved top of the heart.
- Step 9: Rotate the paper and gently fold the corners on both sides inwards to round the heart's shape.
- Step 10: Fold the pointed bottom tip upwards.
- Step 11: Continue to make another small fold with the tip you just folded to form the bottom of the heart.
- Step 12: Congratulations! You have completed a beautiful Origami heart!


