


How to Make an Origami Dress: Easy Step-by-Step Guide
Difficulty:
★★★★★
⏱5-10 mins
📄Specialized Origami Craft Paper

🎬Video Tutorial
📐Step-by-Step Diagram
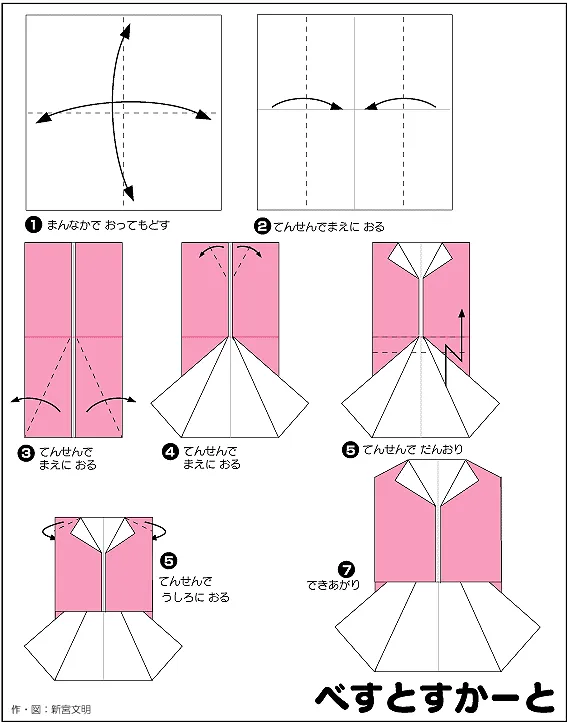
📝 Folding Steps
- Step 1: Fold the paper in half horizontally and vertically, then unfold to create center guide creases.
- Step 2: Fold both side edges inward, aligning them with the center crease.
- Step 3: Fold the bottom corners inward along the dotted lines to shape the skirt. Simultaneously, fold the two top corners inward along the dotted lines to begin forming the V-neck collar.
- Step 4: From the collar formed in Step 3, reverse fold the two upper corners outward along the dotted lines to create the shoulders or outer collar.
- Step 5: Perform a reverse fold along the dotted lines to define and add dimension to the lapel/collar.
- Step 6: Fold the two small top corners of the lapel backward along the dotted lines to complete the collar's shape.
- Step 7: Finished! You now have a lovely little vest/jacket.


