


How to Make an Origami Card Holder: Easy Step-by-Step Guide
Difficulty:
★★★★★
⏱5-10 mins
📄Specialized Origami Craft Paper

🎬Video Tutorial
📐Step-by-Step Diagram
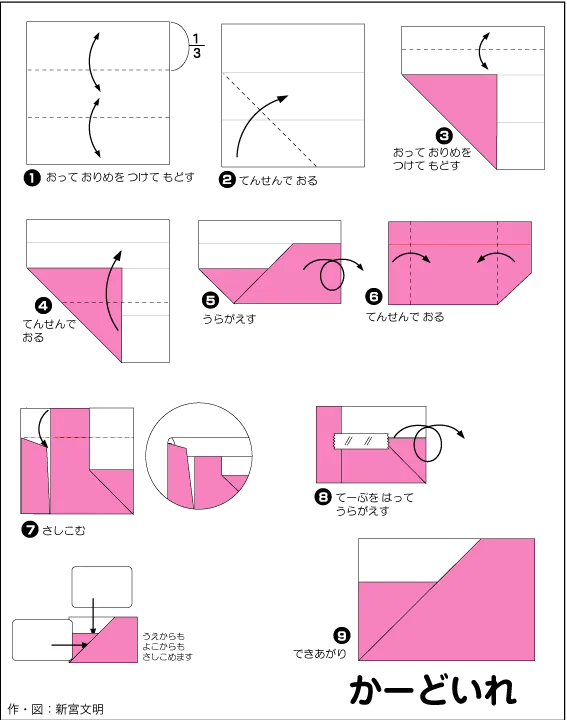
📝 Folding Steps
- Step 1: Start with a square sheet of paper, white side up. Fold the top and bottom edges inward, each approximately 1/8 of the paper's length, to create creases.
- Step 2: Flip the paper over (to the pink side). Fold the paper in half diagonally, from the top-left corner to the bottom-right corner, forming a triangle.
- Step 3: Fold the top-right corner of the triangle down so that its top edge aligns with the diagonal crease made in Step 2.
- Step 4: Similarly, fold the top-left corner behind, creating a hidden layer.
- Step 5: Fold the right corner inward slightly, as shown in the illustration.
- Step 6: Fold both the left and right edges inward to narrow the shape.
- Step 7: Fold the top edge of the pink section down a short distance, creating a small crease. (See the magnified circle for more detail)
- Step 8: Tuck the folded section from Step 7 inside, forming a small pocket.
- Step 9: Finished! This is a lovely card holder.