


How to Make an Origami Business Card Holder: Easy Step-by-Step Guide
Difficulty:
★★★★★
⏱5-10 mins
📄Specialized Origami Craft Paper

🎬Video Tutorial
📐Step-by-Step Diagram
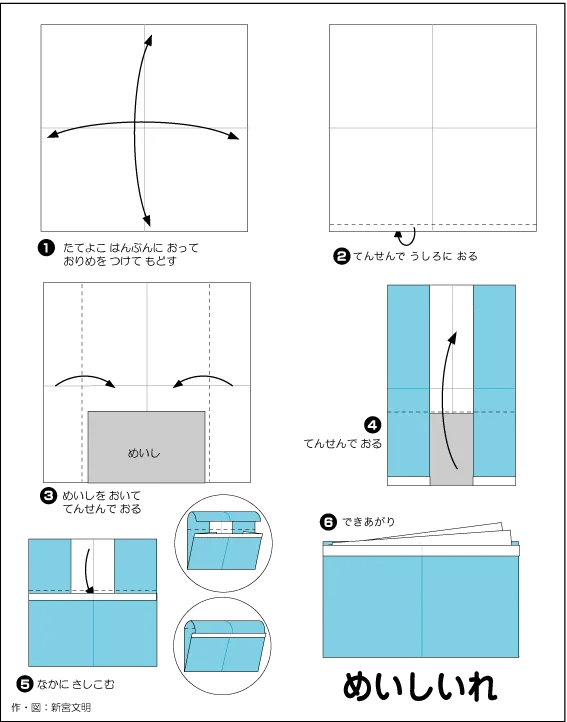
📝 Folding Steps
- Step 1: Start by folding the square paper along both diagonals (creating mountain and valley folds), then unfold to create guide creases.
- Step 2: Fold a small portion of the bottom edge of the paper upwards.
- Step 3: Place a business card (めいし - *meishi*) inside to align, then fold both side edges inwards so they meet at the center crease.
- Step 4: Fold the top edges of the recently folded sides downwards to create pockets (or "flaps").
- Step 5: Next, fold the entire bottom section of the model upwards, then carefully tuck the newly folded edge into the pockets created in Step 4.
- Step 6: And here is your completed Business Card Holder (めいしいれ - *meishi-ire*)!