

How to Make an Origami Bird on a Branch: Easy Step-by-Step Guide
Difficulty:
★★★★★
⏱5-10 mins
📄Traditional Washi or Kami Paper

🎬Video Tutorial
📐Step-by-Step Diagram
📝 Folding Steps
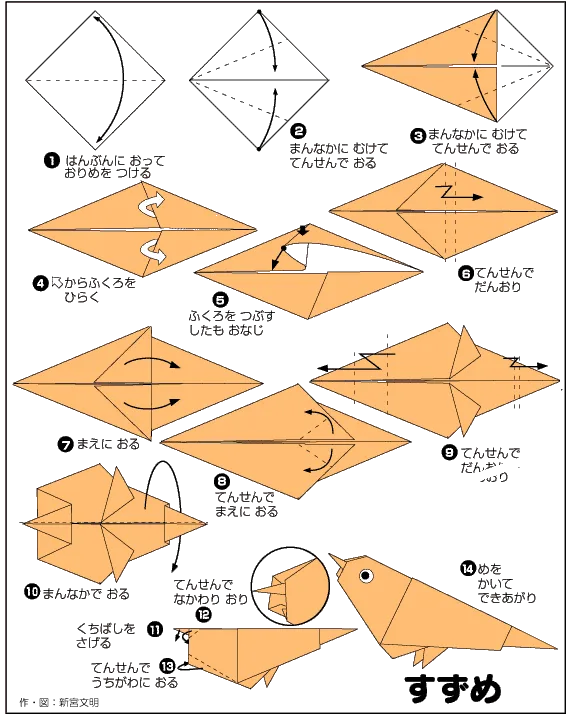
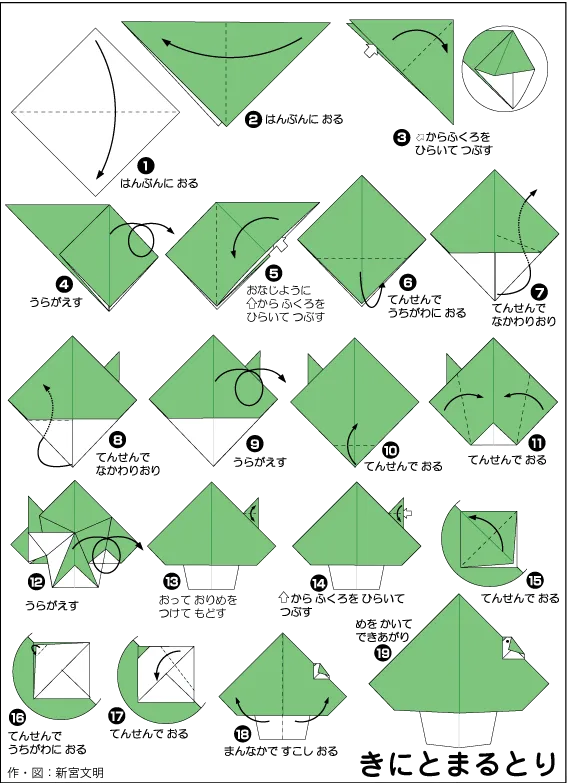
- Step 1: Prepare your paper. Use a square sheet of origami paper. Choose a color that suits your bird. Place the colored side facing up to begin.
- Step 2: Create base creases. Start by folding the paper in half diagonally or horizontally (depending on the diagram) to create a center crease, then unfold. Press firmly to ensure sharp, crisp lines.
- Step 3: Follow the diagram. Following the dashed lines on the diagram (valley folds and mountain folds), fold the corners and edges inward or backward. Ensure all edges are aligned precisely.
- Step 4: Shape and finish. Adjust the final edges, gently pulling out hidden folds to add volume or shape to your bird. Give all creases a final firm press to complete your model.